虚拟机【Oracle VM VirtualBox】搭建Linux系统【centos】
主页
标签
文章
# (一)下载工具 ---------- ## 1.virtualbox 下载地址: [https://www.virtualbox.org/wiki/Downloads](https://www.virtualbox.org/wiki/Downloads) - 根据系统选择相应的安装包 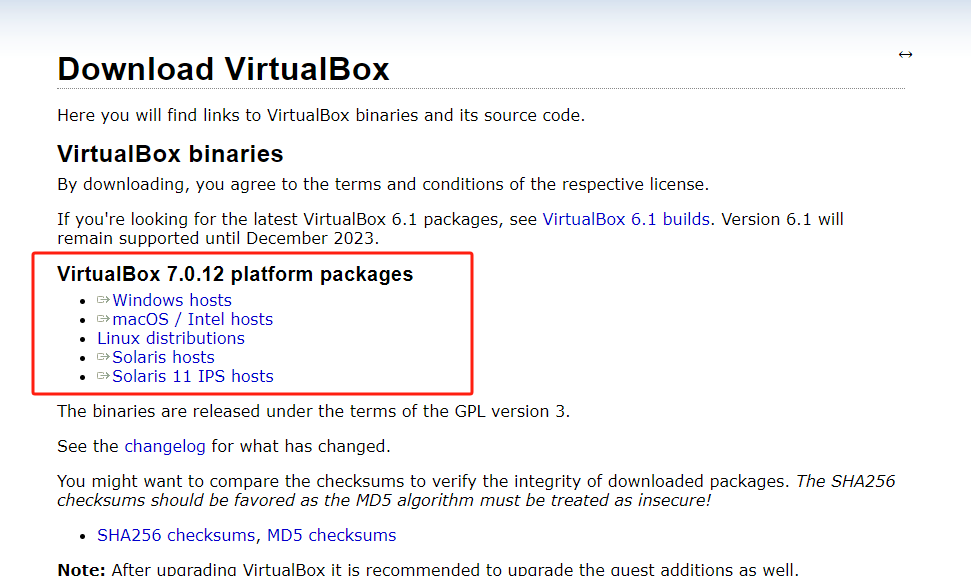 ## 2.centos镜像 下载地址: [https://www.centos.org/download/](https://www.centos.org/download/) - 选择x86_64  - 选择阿里云下载地址 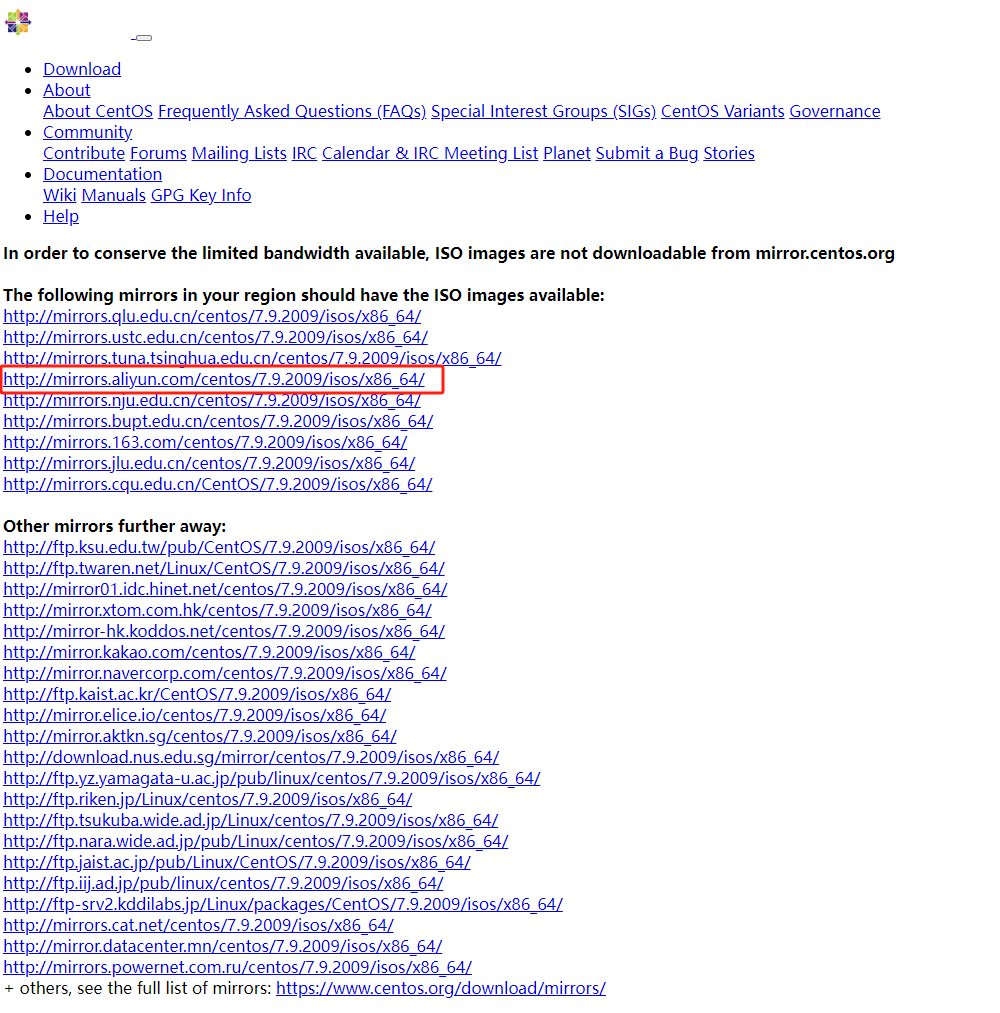 - 下载CentOS-7-x86_64-DVD-2009.iso 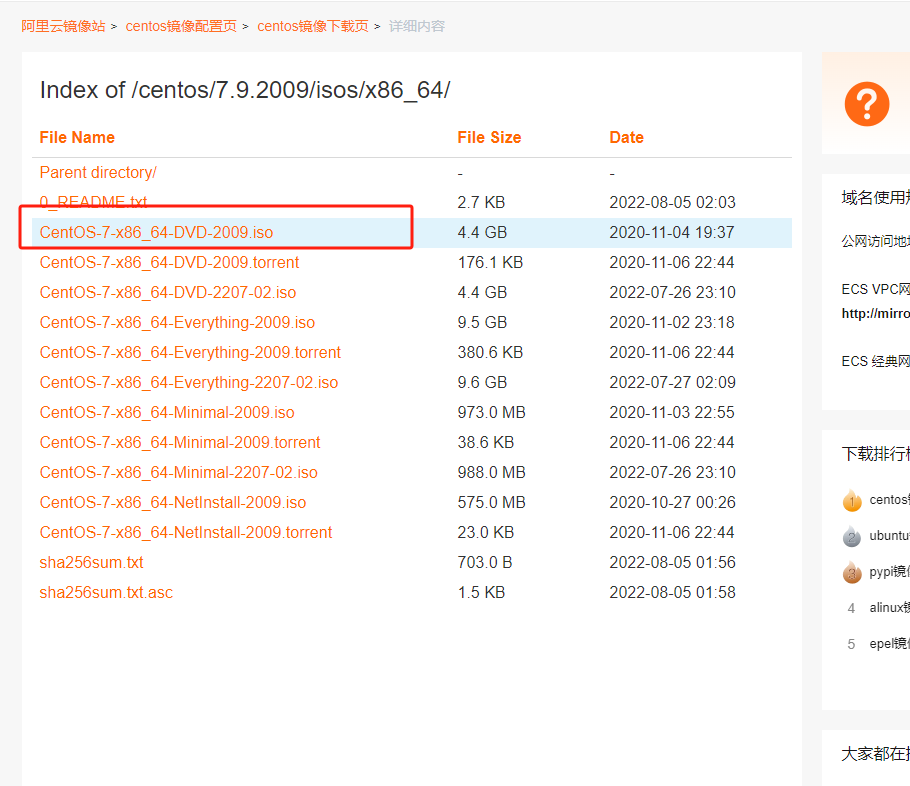 # (二)新建虚拟机 ---------- ## 1.新建 - 教程中使用的是向导模式 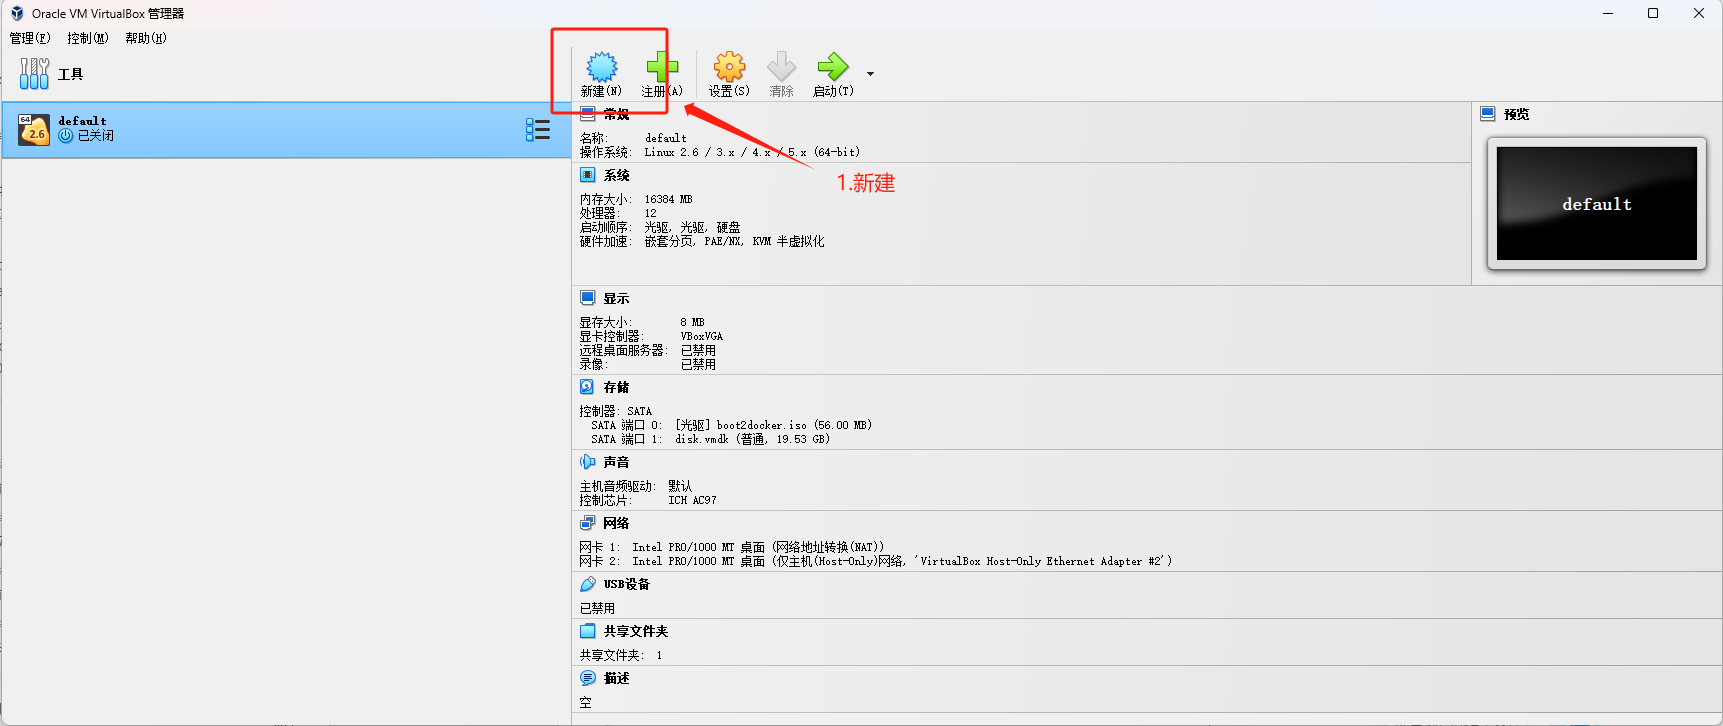 ## 2.基本设置 > Name:给虚拟机起个名字 > Folder:虚拟机存放位置 > ISO Image:刚刚下载的centos镜像位置 > 类型:Linux > 版本:Redhat,和centos是一家人,后面都能自动配置,然后点击【Next】  ## 3.设置用户 - 用户名和密码可以更改一下,不更改也可以使用默认的。然后点击【Next】  ## 4.设置内存和处理器数量 - 我这里给的是4G内存,1CPU,之后也可以在设置中更改。然后点击【Next】 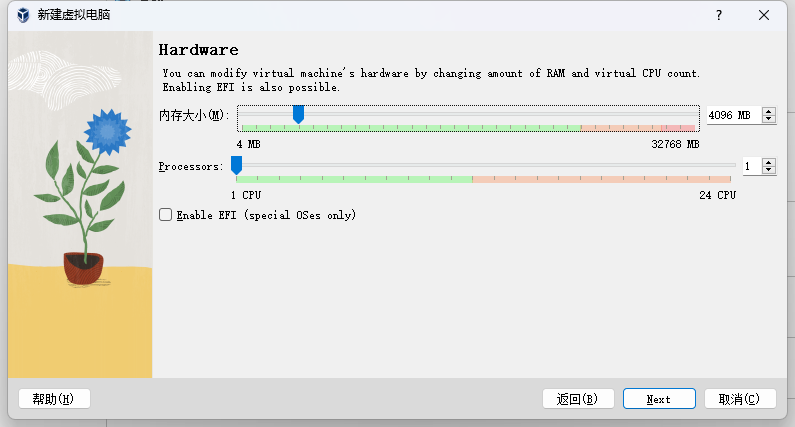 ## 5.创建磁盘 - 磁盘大小我给的20G,可以根据需要更改。然后点击【Next】  ## 6.完成 - 点击【Finish】完成创建 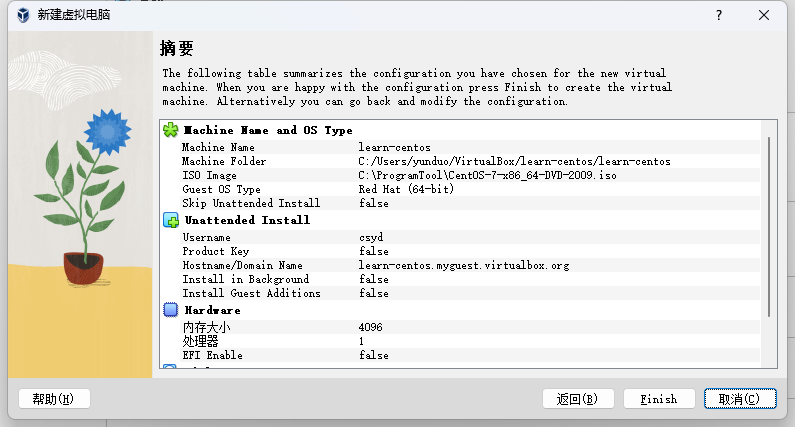 # (三)安装与启动 ---------- ## 1.设置 - 选择刚刚新建的虚拟机,点击【设置】,跳出界面  ## 2.设置控制器 IDE - 点击【存储】 -> 【没有盘片】 -> 【蓝色小圆盘】 -> 找到刚刚下载的ISO镜像文件,点击【OK】完成 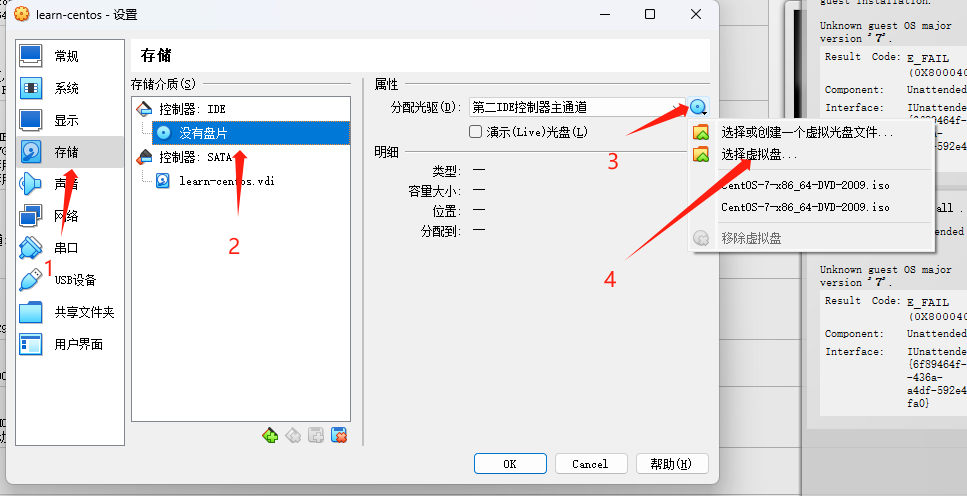 ## 3.启动 - 还是选择这个虚拟机, 然后点【启动】  ## 4.安装CentOS 7 - 启动后进入界面,回车安装  ## 5.选择语言 - 这里选择了简体中文,点击【继续】  ## 6.本地化设置 - 时区如果错误,可以更改下,这里选择的是上海时区 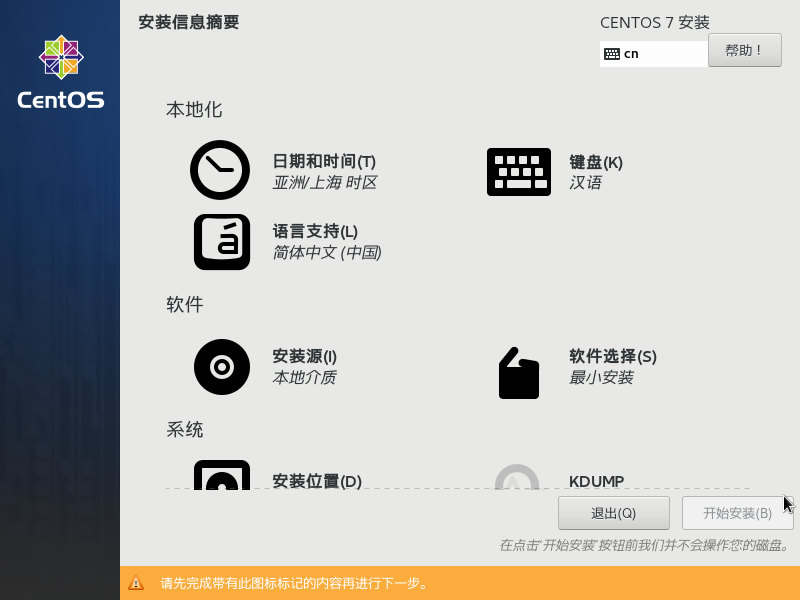 ## 7.系统设置 - 点击【安装位置】 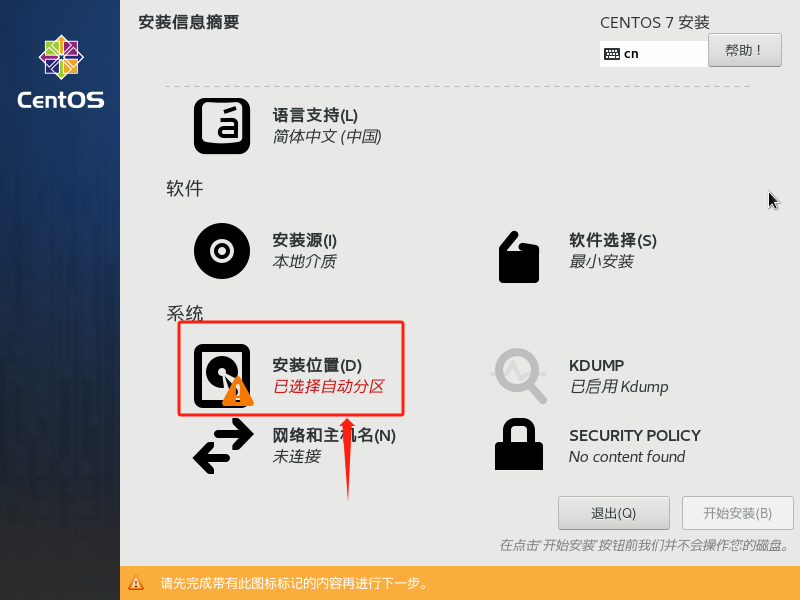 - 选择刚刚创建的20G磁盘(磁盘上有黑白色的√就是选上了),然后点击【完成】 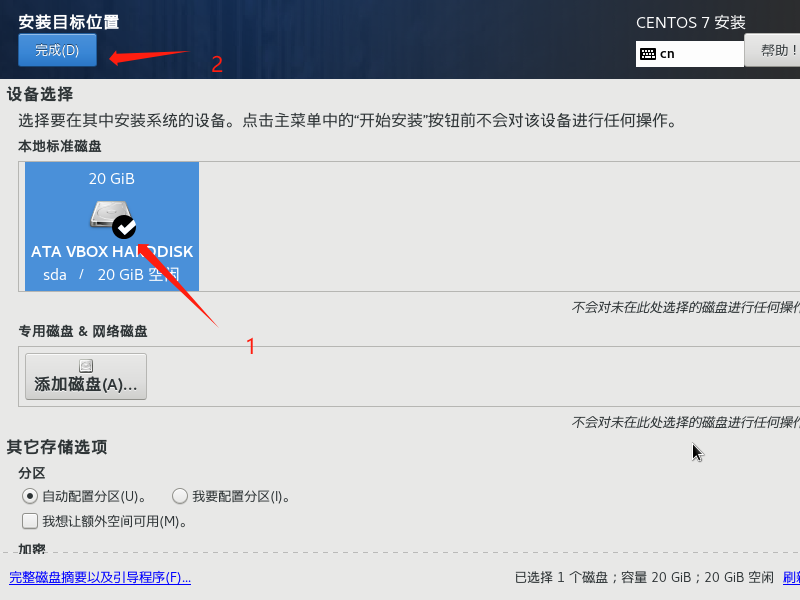 - 回到上一界面后,点击【网络和主机名】设置  - 开启以太网,点击【完成】  ## 8.开始安装 - 回到上一界面后,点击开始安装  ## 9.设置ROOT密码 - 点击【ROOT密码】进入界面 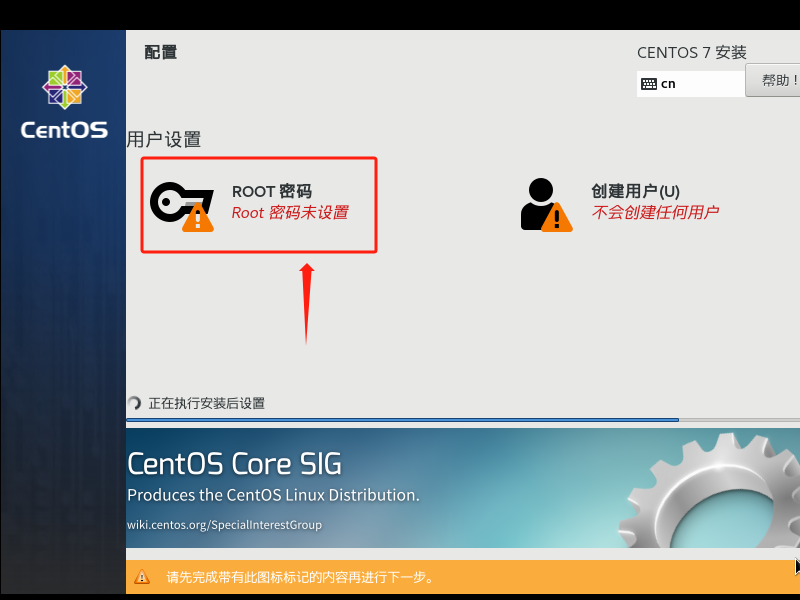 - 输入两次相同的密码,进行确认,然后点击【完成】  ## 10.创建用户 - 如果需要其他用户,可以点击【创建用户】进入界面 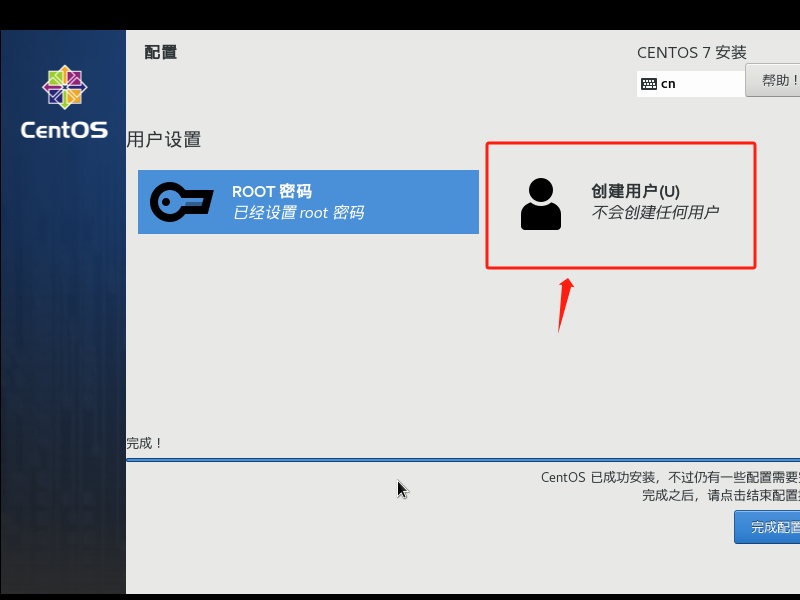 - 设置这个用户的权限和密码,然后点击【完成】 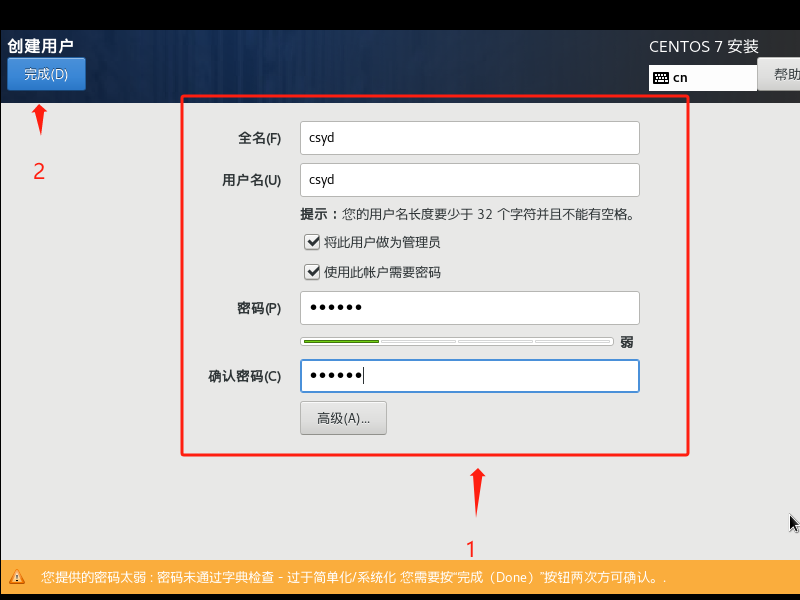 ## 11.安装完成 - 安装完成后,点击【完成配置】 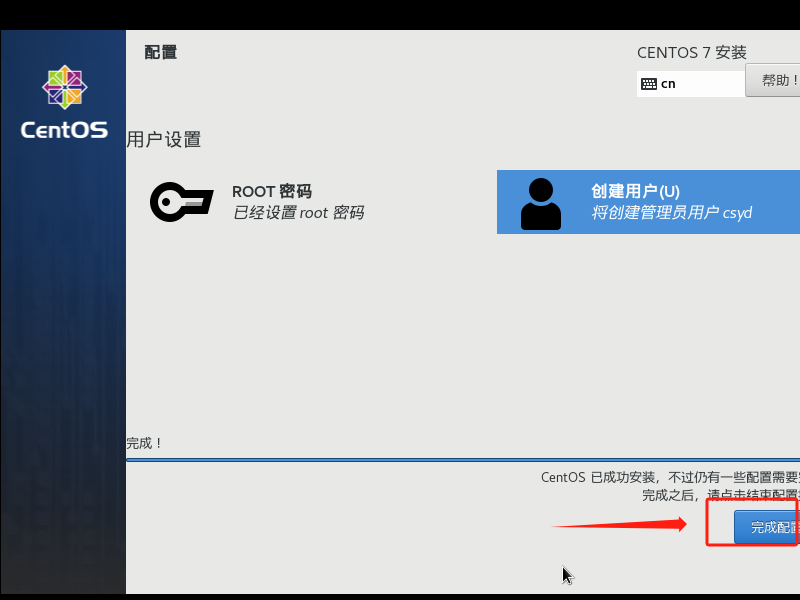 ## 12.重启 - 配置生成好后,点击【重启】 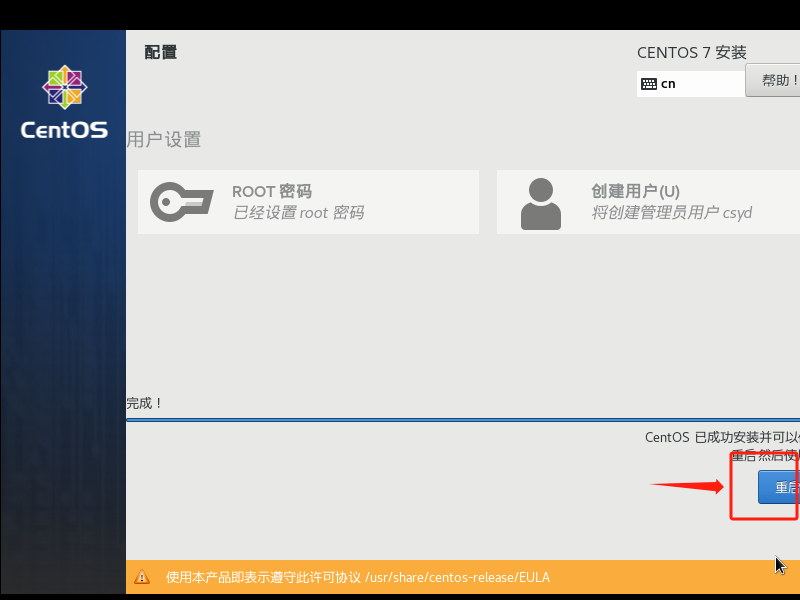 # (四)进入服务器 ---------- ## 1.登入服务器 - 重启完成后,会让你登录,输入你的用户名和密码进行登录(可以用root,也可以用刚刚创建的用户) 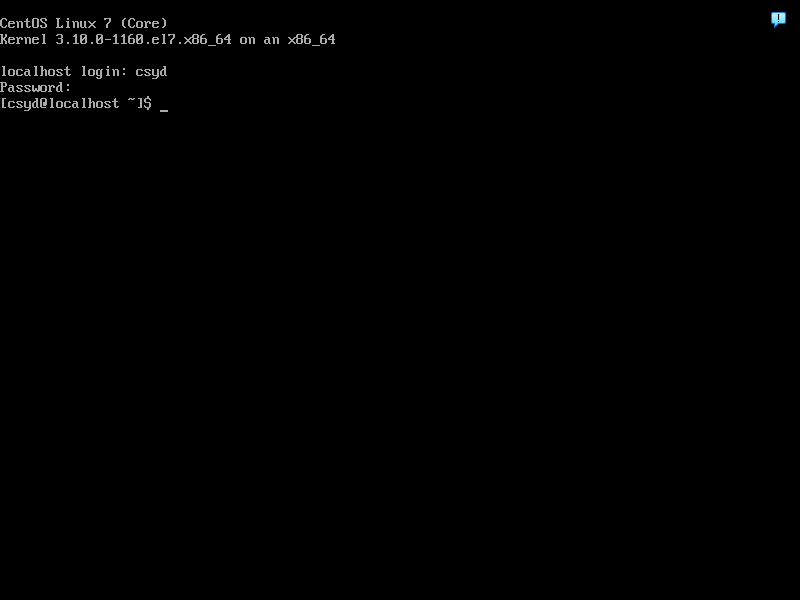 ## 2.测试访问外部网络 - 先ping一下百度,可以能ping通,说明没有问题 ```Shell ping www.baidu.com ``` 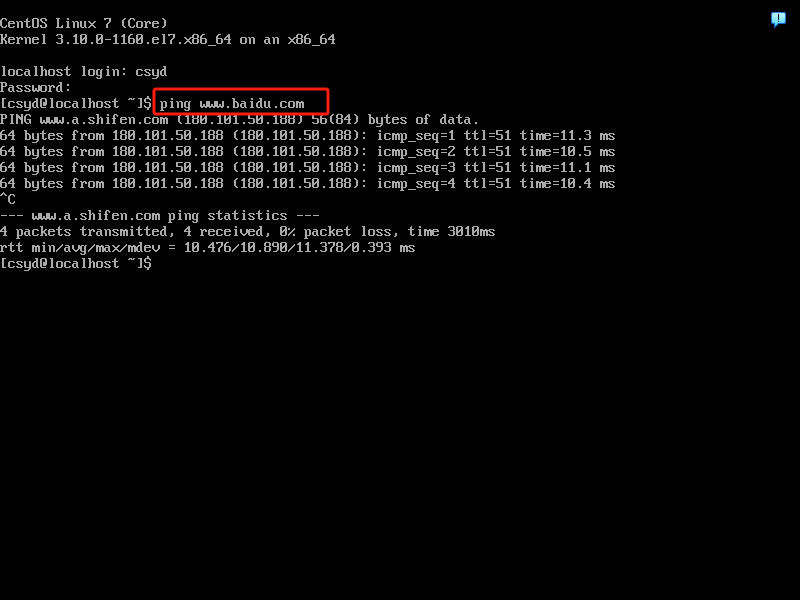 ## 3.设置访问网络 - 查一下IP,发现只有一个分配的内部ip ```Shell ip addr ``` 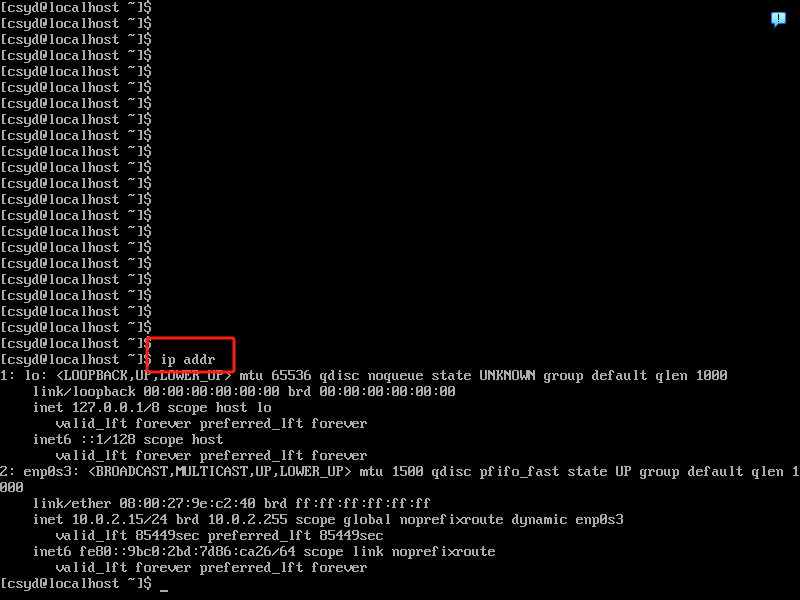 - 退出服务器,选择【正常关闭】 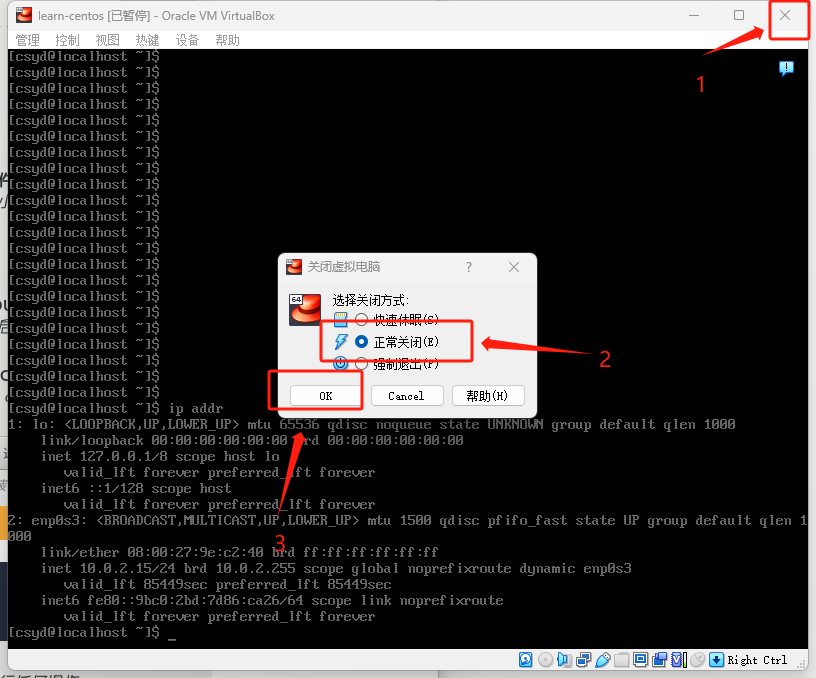 - 选择虚拟机,点击【设置】,跳出界面  - 点击【网络】 -> 【网卡2】,设置好网络2,然后点击【OK】完成 > 连接方式:仅主机(Host-Only)网络 > 界面名称:VirtualBox Host-Only Ethernet Adapter > 混杂模式:全部允许 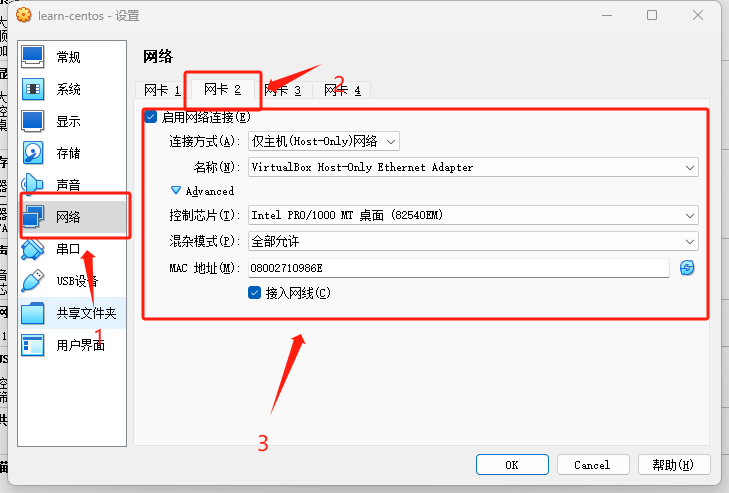 ## 4.测试外部访问 - 再次启动虚拟机并登录,在查一下IP,这时候能看到一个新的IP地址,我这里是192.168.56.101 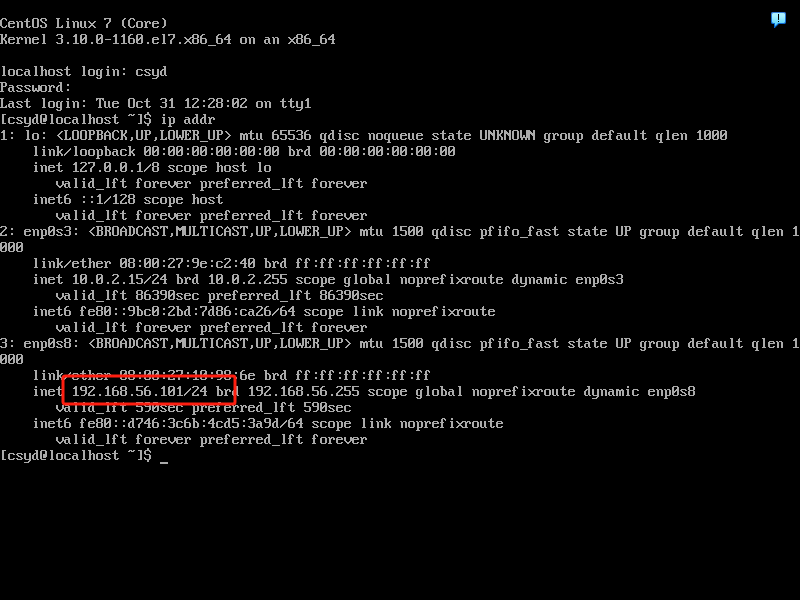 - 虚拟机保持开启,在本机windows中按下键盘【Win+R】,输入【cmd】,打开终端窗口  - ping一下刚刚虚拟中的ip地址,可以ping的通,此时就可以外部访问进来了 ```Shell ping 【你的ip】 ``` 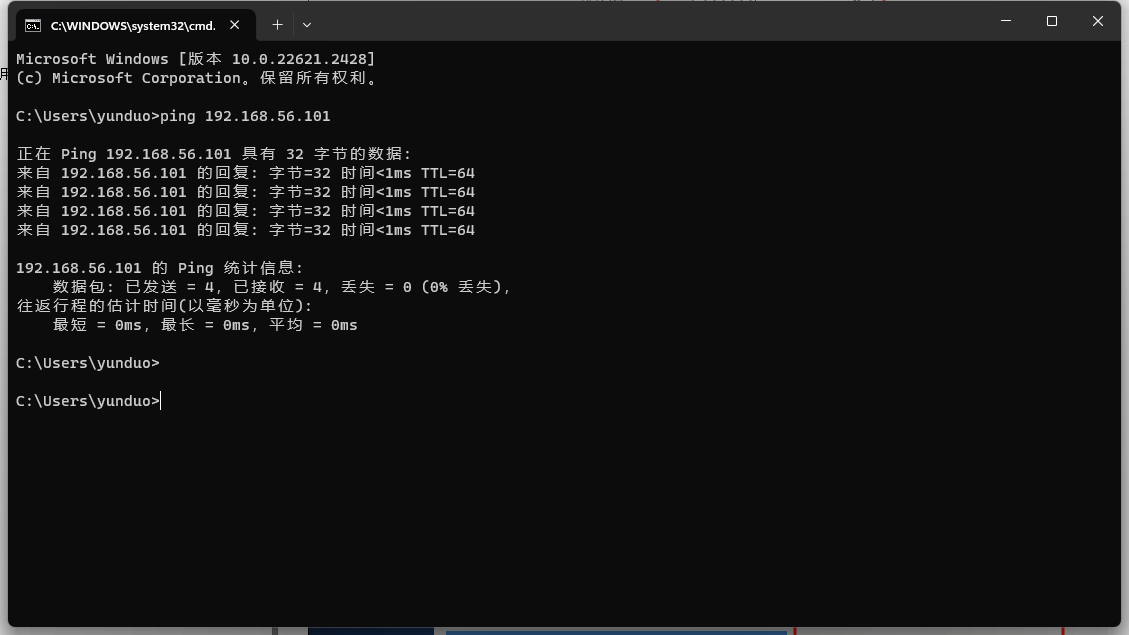 # (五)ssh客户端连接 ---------- ## 1.下载finalShell并安装 https://www.hostbuf.com/t/988.html - 下载完成后,直接双击执行安装,一直下一步就行,没什么需要更改的 ## 2.创建连接 - 创建SSH连接  - 设置连接参数 > 名称:给这个连接起一个名 > 主机:就是刚刚查到的服务器IP,端口默认给22 > 用户名:root或者是刚在centos中创建的用户 > 密码:对应的账号密码  - 创建好后双击这个连接登录  - 接受并保存  - 连接成功 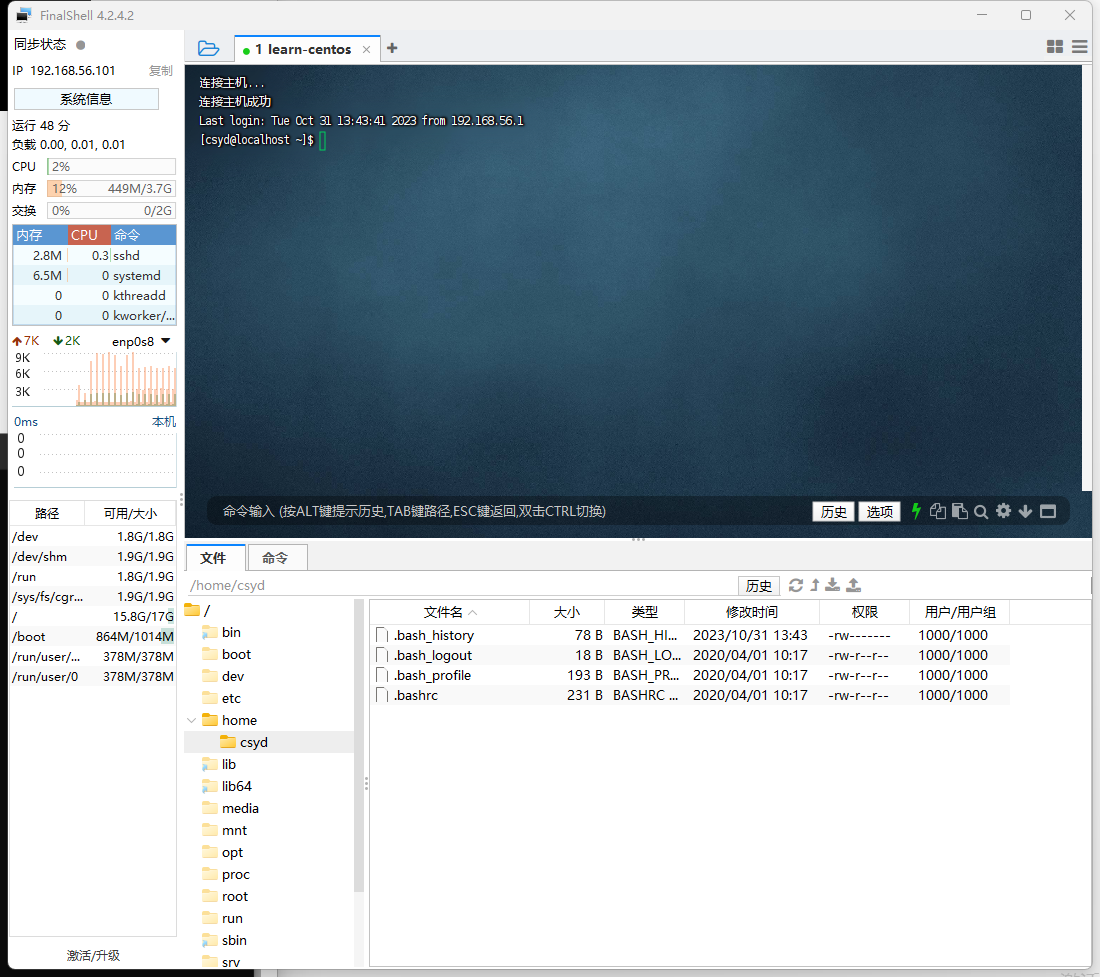 ---------- **参考文章:** https://blog.csdn.net/weixin_42136237/article/details/131314824 https://www.jianshu.com/p/55373fa3002c https://blog.csdn.net/zhouhao707/article/details/126842365 https://blog.csdn.net/weixin_46267823/article/details/132940562
上一篇:
Docker的基础学习与安装
下一篇: 没有文章
Title
-
Artist
0:00